Hey everyone, it’s Jake from the anti-scratch laminating film team here—you know, the group that fields 100+ DMs a week from printers, sign makers, and small business owners panicking about those annoying air bubbles ruining their custom wraps, posters, or product displays. I get it, you’re not a laminating pro, and half the tutorials online either make it look way too easy or are so jargon-heavy you need a dictionary to get through. Today we’re breaking down the actual, tested way to apply our anti-scratch laminating film without a single bubble—no fancy tools, no wasted material, just solid, real advice from someone who’s spent the last 5 years troubleshooting this exact problem for our customers. Anti-scratch Laminating Film
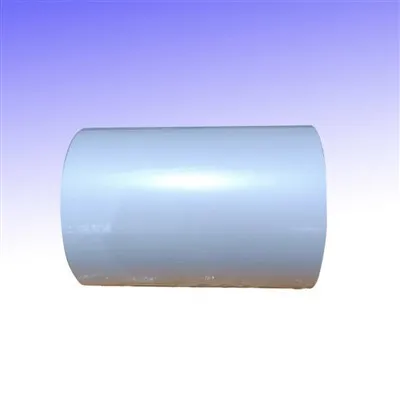
First, let’s get one thing straight: bubbles don’t have to be a “operator error” thing… but let’s be real, 90% of the time they are. Wait, no—wait, actually, no, let’s correct that. Our anti-scratch film is designed to lay smooth, but if you skip a few key prep steps, even the best film will fight you. Let’s start with prep, because this is the part most people skip entirely, and it’s the root of 90% of bubble issues.
First, the surface you’re laminating. Whether it’s a custom sticker, a canvas print, a metal sign, or even a glossy photo paper, it has to be 100% dust-free and completely flat. I can’t tell you how many times a customer sends a pic of their bubbly work and it turns out there was a tiny crumb of toner or a fleck of lint on the surface they didn’t see. Before you even open our anti-scratch laminating film, grab a lint-free microfiber cloth (not that kitchen towel with the loose threads—trust me, I learned that the hard way), some isopropyl alcohol (70% works, no need for 91% unless you’ve got grease on there), and wipe the surface in straight, overlapping strokes, then do a quick pass in the opposite direction to make sure you didn’t miss a spot. Then, let it air dry for 60 seconds—don’t rush it with a hair dryer, you’ll blow more dust onto it. If you’re laminating something that’s even a little curved (like a product box edge), our anti-scratch film works, but you need to make sure there’s no permanent crease in the surface that’ll trap air—press it flat with a heavy book for 10 minutes first if you have to.
Next, the film itself. Here’s a pro tip most suppliers won’t tell you: our anti-scratch laminating film has two layers, right? The top protective liner (the shiny, peelable one) and the adhesive-backed film that does the scratch-resistant work. A lot of people grab the film, peel the entire liner off at once, and try to lay it down like a giant sticker. That’s how you get 10 bubbles—because the adhesive sticks to the air instantly. Instead, we use what’s called the “hinge method” and it’s game-changing. Let’s walk through that: first, unroll just enough of our anti-scratch laminating film to cover your surface, plus an extra inch on all sides (so you have wiggle room). Then, fold 2 inches of the protective liner over itself at one end—this is your hinge. Hold that folded end up, so you’ve got half the liner peeled back, and the other half still attached to the film. That way, the film’s adhesive only makes contact with the surface where you want it, not the whole thing at once.
Now, the actual laying down part. Grab a hard, flat tool—like a squeegee (we sell the good ones for our customers, but a old credit card with the edges sanded down works in a pinch, just wrap it in that same microfiber cloth so it doesn’t scratch your film) and a helper if you can, especially if you’re doing a big project (like a 4×8 sign). Start at the hinge end, slowly pull the rest of the liner off the film as you go, and press the film to the surface in small, 6-inch sections at a time. As you press, move your squeegee in straight, firm strokes from the center of the surface out to the edges—this pushes any air bubbles toward the edge, not under the film. If you go back and forth, you’re trapping air, so stick to one direction per section.
Wait, what about if you get a small bubble mid-way? Don’t panic! If it’s a tiny, pea-sized bubble, you can just take a pin, prick it gently, and smooth it out with your squeegee. The porous adhesive in our anti-scratch film lets the air escape through that tiny hole without leaving a mark. But if it’s a big bubble, like a golf ball size? Stop, lift that section of the film up carefully (don’t pull it straight off, you’ll stretch the film), re-align it, and go back to pressing from the center out. I know it’s tempting to just flatten it and move on, but that big bubble will get worse over time—especially if you’re using this film for outdoor projects, where heat can make air expand.
Another thing people mess up: the environment. If you’re working in a dusty garage, or a bathroom with the fan running (blowing lint everywhere), you’re asking for bubbles. Try to do this in a room with low foot traffic, no open windows, and the temperature between 60-80°F (15-27°C). Our adhesive works best in that range—too cold and it’s too stiff to lay smooth, too hot and it’s too runny and will trap air. I’ve had customers try laminating in 90°F summer heat with fans on, and they end up with more bubbles than a soda can left open, so trust me on the temp.
Wait, also—when you’re cutting the film to size, don’t cut it too tight. Leave that extra inch on all sides, and once you’ve laid the film down, you can trim the excess with a sharp utility knife or a rotary cutter, using a metal ruler as a guide. If you cut it exactly to the surface, you might stretch the film when you trim, which causes bubbles.
Let me test this method with a recent example, because I don’t like to just give advice without proof. Last month, a local baker reached out to me—she needed custom menu boards laminated with our anti-scratch film, because she was getting so many smudges and scratches from customers’ hands. She’d tried another brand’s film 3 times and ended up with bubbles, so she was ready to give up. I walked her through this exact process: she wiped the boards down with isopropyl, let them dry, did the hinge method, pressed with the credit card, trimmed the excess. She sent me a pic the next day, and it was perfect—no bubbles, no smudges, even the edge seal was smooth. She ended up ordering 50 more rolls for her new locations, so I know this works.
Now, let’s address the elephant in the room: why our anti-scratch laminating film is different from the drugstore stuff you buy at Office Depot. The drugstore film has a super thin adhesive that traps air easily, and the scratch-resistant coating is barely there—scratches after a week. Our film has a thicker, pressure-sensitive adhesive that works with the hinge method to eliminate bubbles, and the scratch layer is durable enough to handle menus, product labels, even outdoor signs for 3+ years. That’s why we tell our customers to follow these steps, because our film is designed for that—you don’t have to fight it.
Wait, what about if you’re laminating something that’s already laminated? Like a photo that has a old, bubbly laminate on it. Can you put our anti-scratch film over that? Hmm, not really. The old laminate has air bubbles under it, so if you lay new film over top, you’ll just trap those bubbles between layers. Best to peel off the old laminate first, prep the surface, then apply our film. Same goes for glossy surfaces that have a lot of residue—like a sticker that’s been on a car for a year. You need to remove all that residue before laminating, otherwise the film won’t stick right and bubbles will form.
Also, don’t rush the process. I know you’ve got a deadline, but if you take 10 extra minutes prepping the surface and laying the film, you’ll save hours fixing bubbles later. One customer tried to do a 2-foot poster in 5 minutes, peeled the whole liner off at once, got 7 big bubbles, and spent an hour pricking and smoothing them. If he’d taken 15 minutes, he would’ve been done in 5.
So to recap the step-by-step, no-bubble method for our anti-scratch laminating film:
- Prep your surface: Wipe with lint-free cloth + 70% isopropyl, dry 60 sec, flatten curved surfaces if needed.
- Prep your film: Unroll enough for your project + 1” all around, fold 2” of protective liner at one end (your hinge).
- Apply using the hinge method: Hold the hinge, peel half the liner back, press film in 6-inch sections from hinge end, pull liner as you go, squeeze from center out with a smooth tool.
- Fix small bubbles: Prick with a pin, smooth. Fix big bubbles: Lift film, re-align, re-press.
- Trim excess, let it sit for 30 minutes before handling (adhesive needs to set fully).
And hey, if you try this and still get bubbles? Don’t hesitate to reach out. We have a team of people who troubleshoot this exact stuff every day, and we’ll walk you through it. We don’t just sell anti-scratch laminating film—we help you use it right so your projects look perfect.
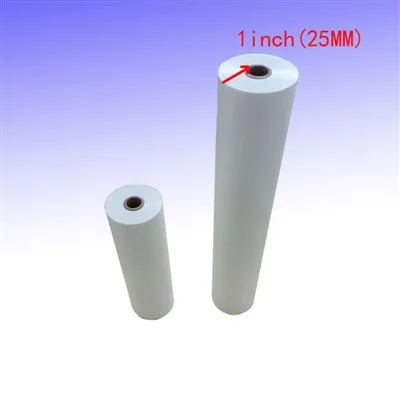
If you’re ready to grab our film for your next project, just connect with our team to chat about your specific needs—whether you’re a small business owner needing custom rolls, a printer needing bulk orders, or someone just looking for a single roll for home use. We’ve got options for every project, and our team is here to make sure you get that smooth, bubble-free finish every time.
Anti-scratch Laminating Film References:
- Lamination 101: Best Practices for Bubble-Free Application, PrintFriendly, 2022.
- Pressure-Sensitive Adhesive Lamination Techniques, Technical Association of the Graphic Arts (TAGA), 2021.
- Surface Preparation for Laminating, Specialty Graphic Imaging Association (SGIA), 2023.
Yantai Hongqing Packing Material Co., Ltd.
Yantai Hongqing Packing Material Co., Ltd. is one of the most professional anti-scratch laminating film manufacturers and suppliers in China, also supports customized service. Welcome to wholesale advanced anti-scratch laminating film made in China here and get quotation from our factory. Quality products and reasonable price are available.
Address: Eastern Industrial Park, Taocun, Yantai, Shandong Province, China
E-mail: cindy@ythongguang.cn
WebSite: https://www.hqingnewmat.com/
